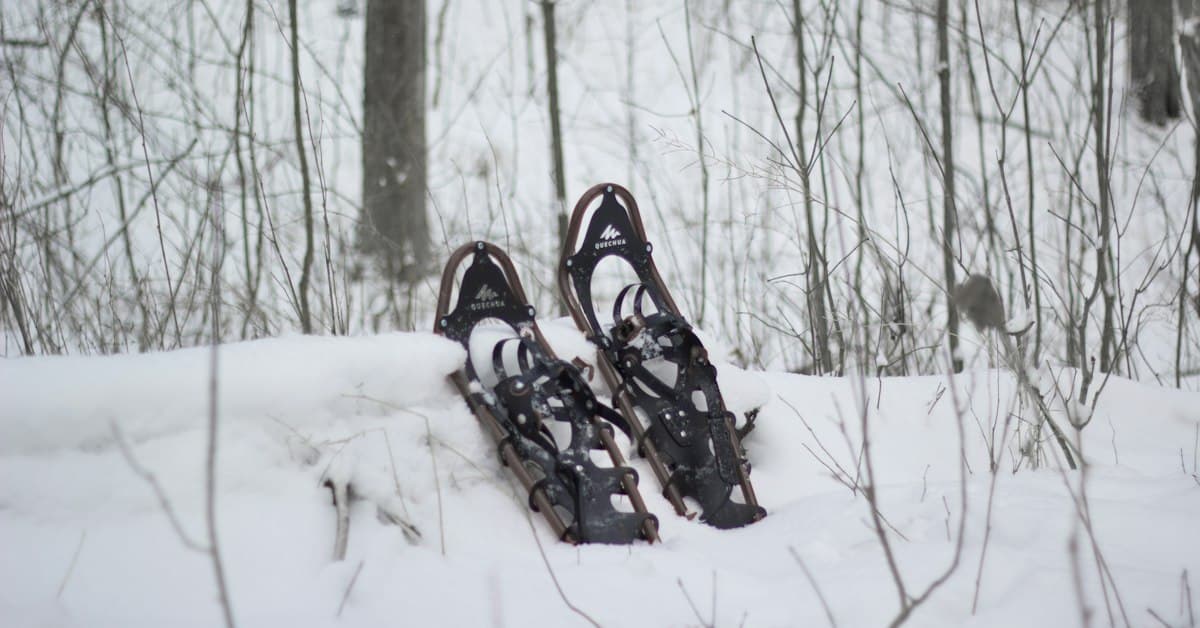
Snowshoe Comparison: The Complete Buying Guide
The typical snowshoe purchase happens in a rush — on a resort car park, the morning of a long-planned outing. You grab whatever's in stock without really understanding what you're paying for. This guide doesn't recite catalogue specs. It gives you the method to choose snowshoes that match your weight, your terrain and your budget — then compares the four TSL models we recommend this season.
1. Calculate the Flotation You Actually Need
This is the criterion nobody calculates, yet it's the first thing to verify. Flotation — expressed as the total surface area of the snowshoe deck in cm² — determines whether you walk on the snow or through it.
The core rule: take total weight into account, meaning your body weight plus the weight of your pack. A day hike with 10 kg on your back is not the same as a stroll with an empty daypack.
The calculation:
- Flat terrain (packed snow, forest, plateau): allow roughly 15 cm² per kilogram of total weight.
- Steep terrain (slopes above 25 %, powder snow): allow roughly 18 to 20 cm² per kilogram.
Practical example: you weigh 72 kg, you're carrying an 8 kg pack → total weight 80 kg. On flat terrain, you need at least 1,200 cm² of deck area. On steep terrain or in fresh powder, go up to 1,450–1,600 cm².
Most manufacturers list deck area in product specs. If that figure isn't visible, be cautious — generic budget snowshoes are often undersized the moment the snow softens.
2. Flat or Steep Terrain: Two Very Different Frame Designs
The second classic mistake: buying "all-purpose" snowshoes without understanding how much the frame affects efficiency.
Rigid frame: for flat or gently sloping terrain
A fixed frame between the boot and the snowshoe deck works perfectly for forest walks, plateaus and easy cols. The benefits: lower price, simple construction, minimal maintenance. The drawback: on steeper climbs, the foot stays flat relative to the slope, putting extra strain on the Achilles tendons and tiring the calves over time.
Articulated/pivoting frame: for steep terrain
Once you tackle slopes steeper than 20–25 %, an articulated frame at the front of the foot changes the experience entirely. The snowshoe follows the natural movement of the foot; the heel lifts freely. The result: a more fluid stride, less muscular effort on the way up, better crampon grip on the slope.
Outings in the Pyrenees or Alps in winter demand this type of frame whenever the route leaves a well-packed marked trail.
3. Bindings: Speed vs Security
The binding system connects your boot to the snowshoe. Two philosophies exist on the market.
Quick-step (or click) bindings
One gesture, and you're in. Ideal for families, beginners, or outings where you put on and take off snowshoes frequently. Compatible with most standard hiking boots (up to around 32–34 cm sole length). Note: check that your boot's sole width is compatible — wide-soled technical hiking shoes or trail runners can fall outside standard fit ranges.
Adjustable strap bindings
More versatile: they accommodate a wider range of footwear, including ski touring boots or light mountaineering shoes. More stable on demanding terrain. The trade-off: they take longer to adjust with cold fingers, which matters at −10 °C.
Also look at the crampons under the binding: this is where the snowshoe grips on icy surfaces. Budget snowshoes often have short crampons (10–15 mm), sufficient on packed snow. On mixed terrain (icy in the morning, muddy by afternoon), 15–20 mm crampons significantly improve confidence.
4. The Heel Lift: The Small Detail That Changes Everything
The heel lift (sometimes called "anti-rotation bar" or "heel riser") is a small foldable element under the heel that holds it slightly raised during uphill walking.
The effect is real: on a 20 % slope, using the heel lift reduces calf contraction by 25 to 30 % with each step. On a 3–4 hour outing with 500 m of elevation gain, the difference in fatigue is meaningful.
The heel lift is included on mid-range and high-end models. It is absent — or sold as an optional add-on — on entry-level snowshoes. If you're a regular hiker and your outings include significant elevation gain, this is a feature worth prioritising.
5. Renting vs Buying: The Honest Maths
If you're just starting out or only go snowshoeing once or twice a year, renting is the smarter option. Rental costs range from €15 to €25 per day depending on the resort and model. It lets you test different systems with no upfront commitment.
The break-even point sits around 5 to 6 outings. Beyond that, you've recovered the cost of an entry-level pair. With 6 to 8 outings a year, buying is consistently cheaper and more comfortable: your settings are memorised, you know your snowshoes.
A well-maintained pair of snowshoes lasts 8 to 12 years. Wear parts (rubber bumpers, crampon rivets, straps) can be replaced individually on major-brand models.
6. The Four Models We Recommend: From Beginner to Experienced Hiker
With those criteria established, here are the four snowshoes that stand out this season. All are made by TSL, a French brand based in Haute-Savoie — one of the few that controls the entire production chain.
TSL 302 Freeze — entry-level for flat terrain — from €48.99
The 302 Freeze targets walkers, families and occasional users. Rigid frame, quick-step binding, short crampons. It offers sufficient flotation for total weights up to 100 kg on packed snow. Don't ask it to tackle steep slopes or deep powder: it's not built for that.
Strength: the price. It's the snowshoe to recommend to someone unsure they'll go out more than once a year. Limitation: no heel lift, short crampon, very limited terrain range.
TSL 305 Initial — the versatile all-rounder — from €135.92
The 305 Initial is the sensible choice for a regular snowshoer. Articulated frame, adjustable strap binding, 15 mm crampon. It handles total weights up to 110 kg and performs well across varied terrain: forest, plateau, moderate slopes up to 30 %. Heel lift included.
Strength: the value for money. It covers 90 % of snowshoeing situations in France. Limitation: on steep, technical terrain (hard snow, sustained gradient), the crampons show their limits.
TSL 438 Up & Down Grip — the steep terrain specialist — from €169.23
The 438 Up & Down Grip was designed for hikers who don't stop at marked trails. Reinforced articulated frame, lateral crampons in addition to the central crampon, heel lift adjustable to two positions. Grip on hard snow and slopes steeper than 35 % is significantly better.
Strength: traction on technical terrain. On routes like the Pyrenees or Alps in winter, it gives real confidence. Limitation: slightly heavier than the 305, overkill on easy terrain.
TSL Symbioz — the high-end flexible-frame model — from €238.23
The Symbioz is TSL's patented flagship snowshoe. Its "biostep" frame mimics the natural movement of the foot with an extra degree of torsional flexibility, reducing fatigue over long distances. Ultra-light construction (790 g per pair), 20 mm crampon, hybrid quick-strap binding. It targets committed hikers, multi-day outings and demanding terrain.
Strength: long-distance comfort. If you regularly carry 12–15 kg packs over varied terrain, the investment is justified. Limitation: the price. And a slight learning curve: the biostep system takes two or three outings to feel completely intuitive.
Summary: Which Snowshoe for Which Profile?
| Profile | Recommended model |
|---|---|
| Occasional walker, easy terrain | TSL 302 Freeze |
| Regular hiker, varied terrain | TSL 305 Initial |
| Steep slope enthusiast, off-trail | TSL 438 Up & Down Grip |
| Demanding hiker, multi-day, heavy loads | TSL Symbioz |
Once you've chosen your pair, read our guide to making the most of your first snowshoe outing: boot fitting, walking technique and safety tips.
As an Amazon Associate, we earn from qualifying purchases. Links marked with an external icon are affiliate links.
Related reading
The Most Beautiful Winter Hikes in the Pyrenees
Seven winter hikes in the Pyrenees accessible without technical equipment: valleys, frozen lakes and snow-covered cirques.
Dedicated GPS vs Smartphone for Hiking: The Definitive Comparison
Do you really need a dedicated GPS when you have a smartphone? Battery life, accuracy, cold resistance, and real costs: a clear verdict.
Avalanche Safety Basics for Hikers
Understanding avalanche risk in winter hiking: the European scale, critical slopes, reading the bulletin, and the limits of what hikers can safely manage.